Room to Spare
Posted by Adam A. Ries in DIY, Home Improvement, Interior Design on May 29, 2016
Spare bedroom, that is.
Several months without a post. That doesn’t mean I haven’t been busy, just that I haven’t been working on my own home. In fact, in the last two months I’ve helped my brother-in-law with different aspects of their master bathroom remodel, and a partial remodel on my mother’s kitchen (reconfigured the existing base cabinets, installed a dishwasher, built additional base cabinets, and installed new countertop).
But sometime in between building cabinets in my unheated garage in the middle of an Ohio February, I finished painting the spare bedroom and nailed the window trim & baseboards back into place. Wow, did that make a difference!
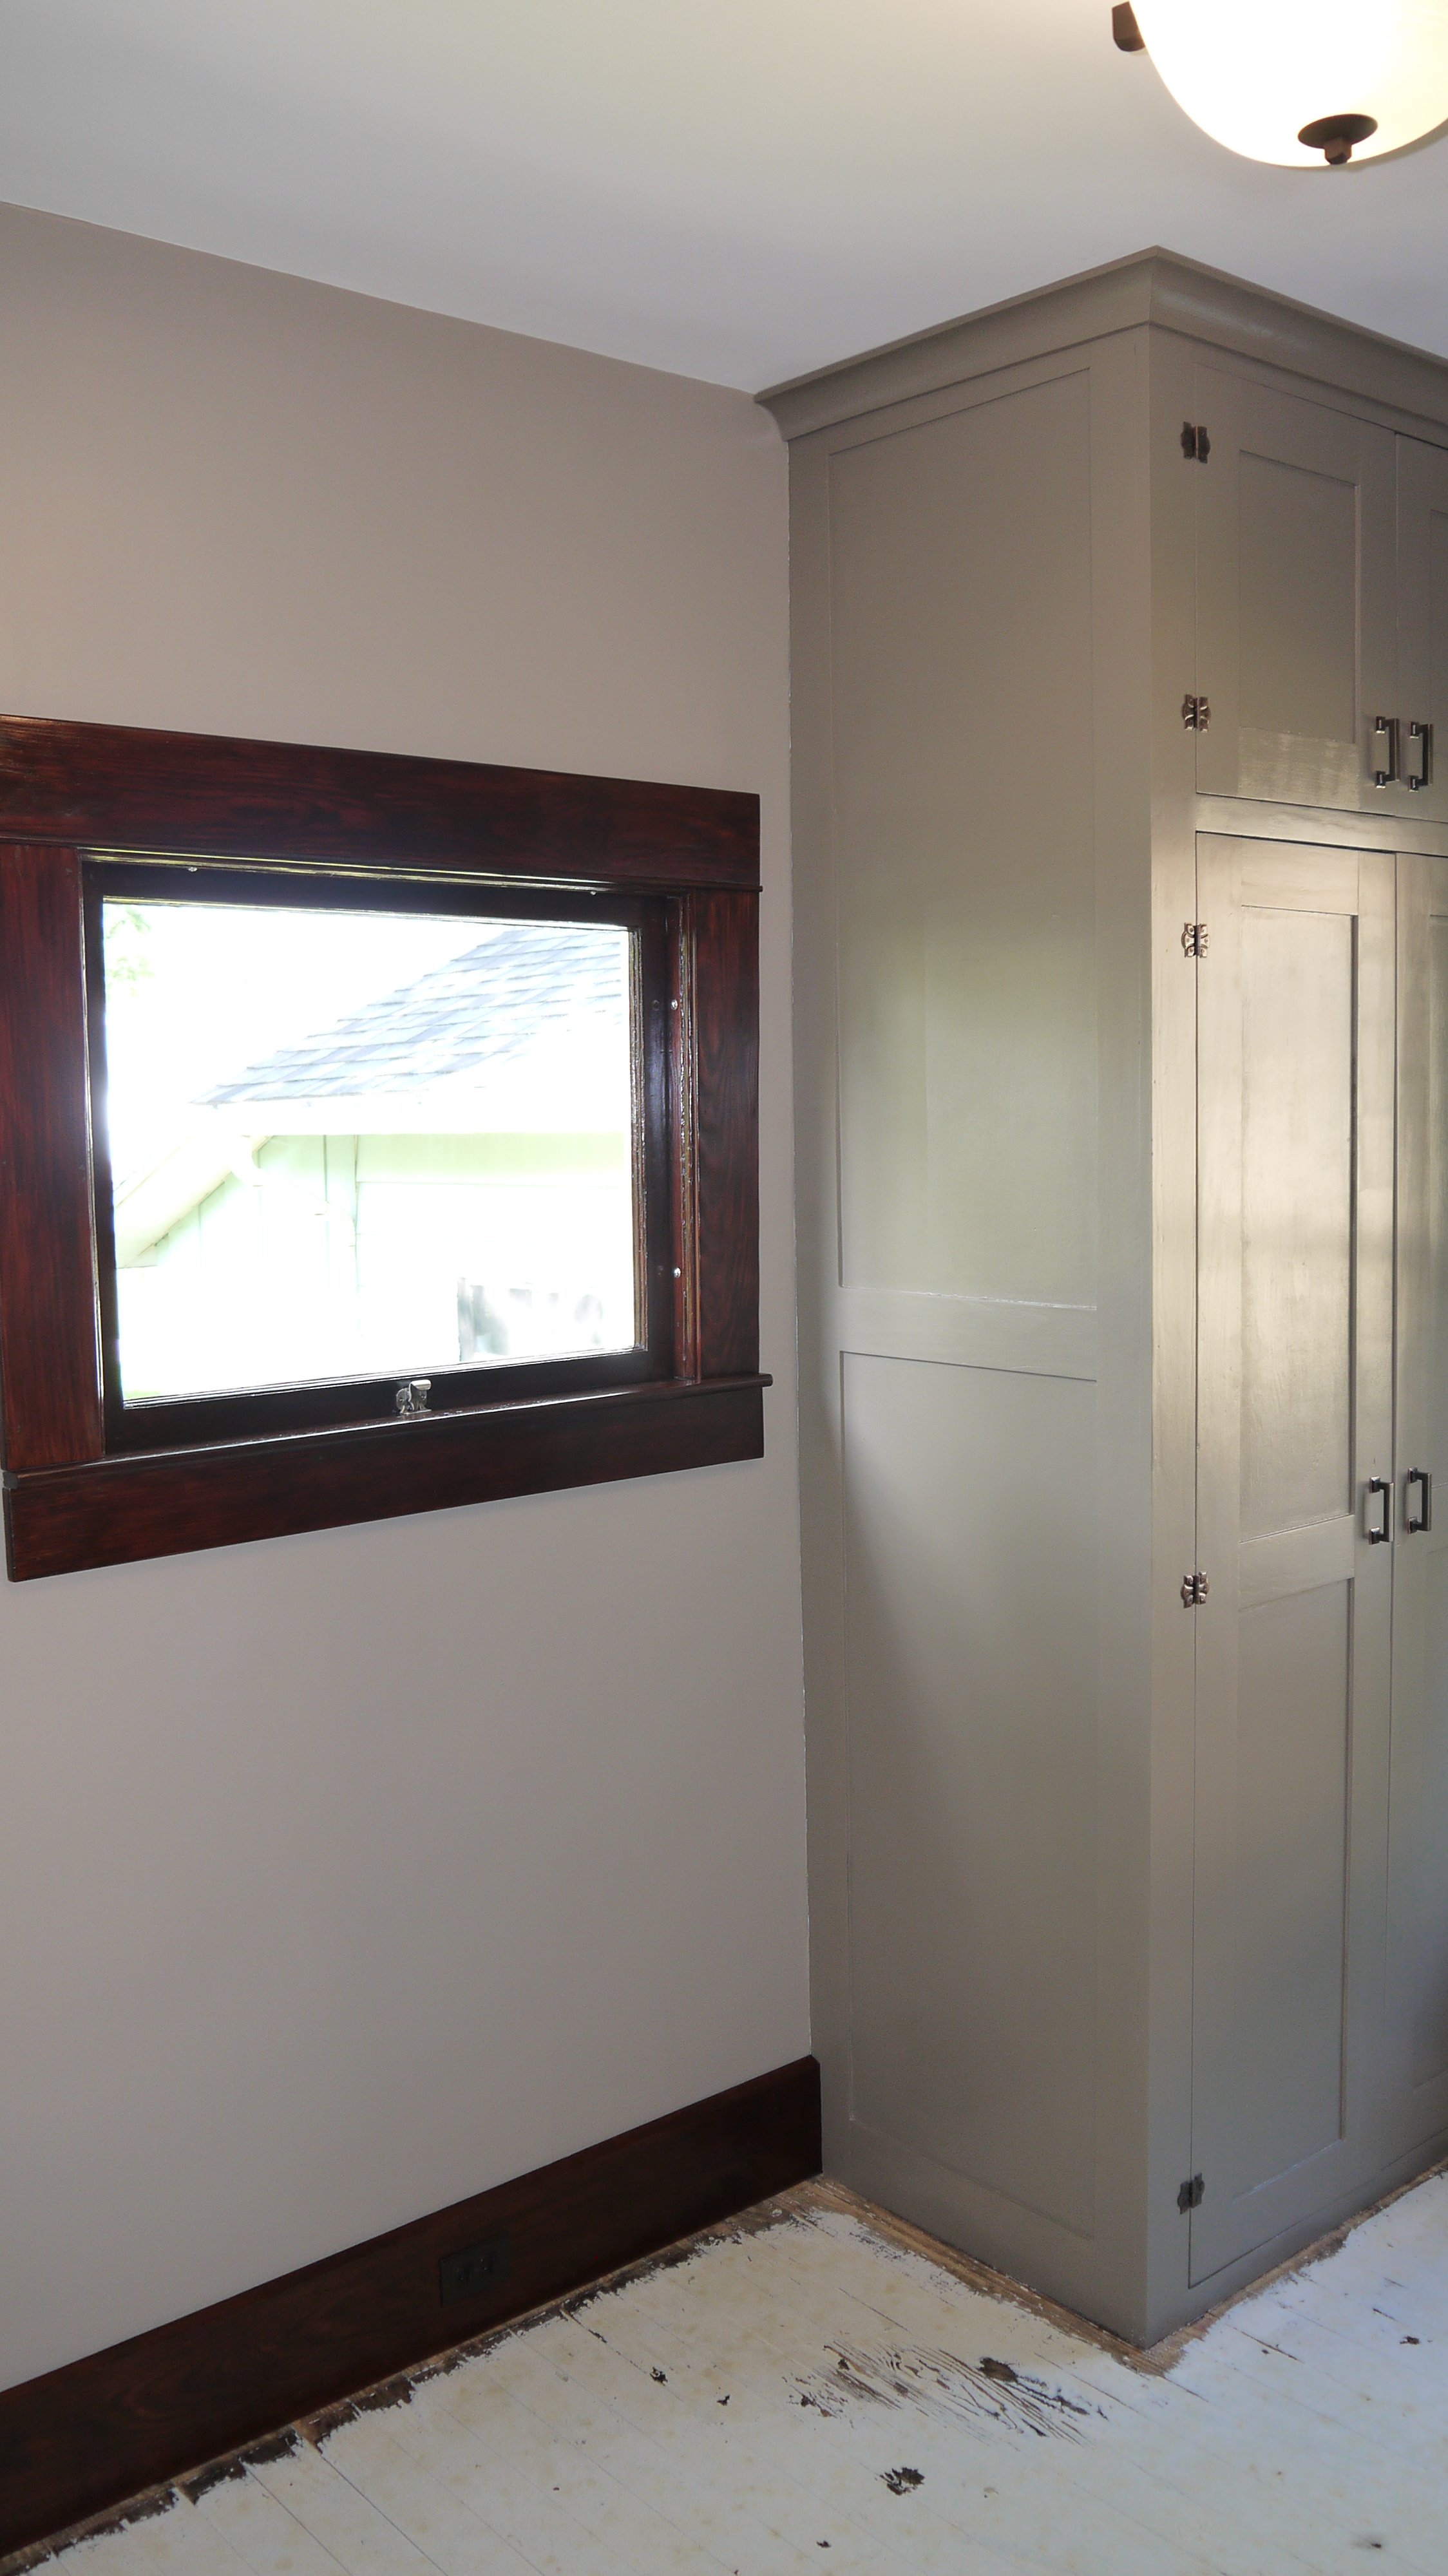
While reinstalling the baseboard, I added outlets to the perimeter of the bedroom through the baseboard. Each bedroom only had 1 original outlet to begin with. And I added the new outlets in the baseboard, just as the existing outlets were placed. I used brown outlet and outlet covers to help them disappear into the dark woodwork.


I already described the process of sanding & re-painting the wardrobe, and installing the light. Along with all new wiring, I can add this room to the 99% finished list along with the bathroom and laundry. (Like nearly every other room, the floor needs a few nails here and there to secure the boards, and then a whole-house floor refinishing party.)
Lastly, I found a door to fit at an architectural salvage store (the spare bedroom was door-less when I bought the house). It matches the bathroom door, but unfortunately was painted on one side. I spent the better part of 2 days stripping the paint – first white, then orange underneath.

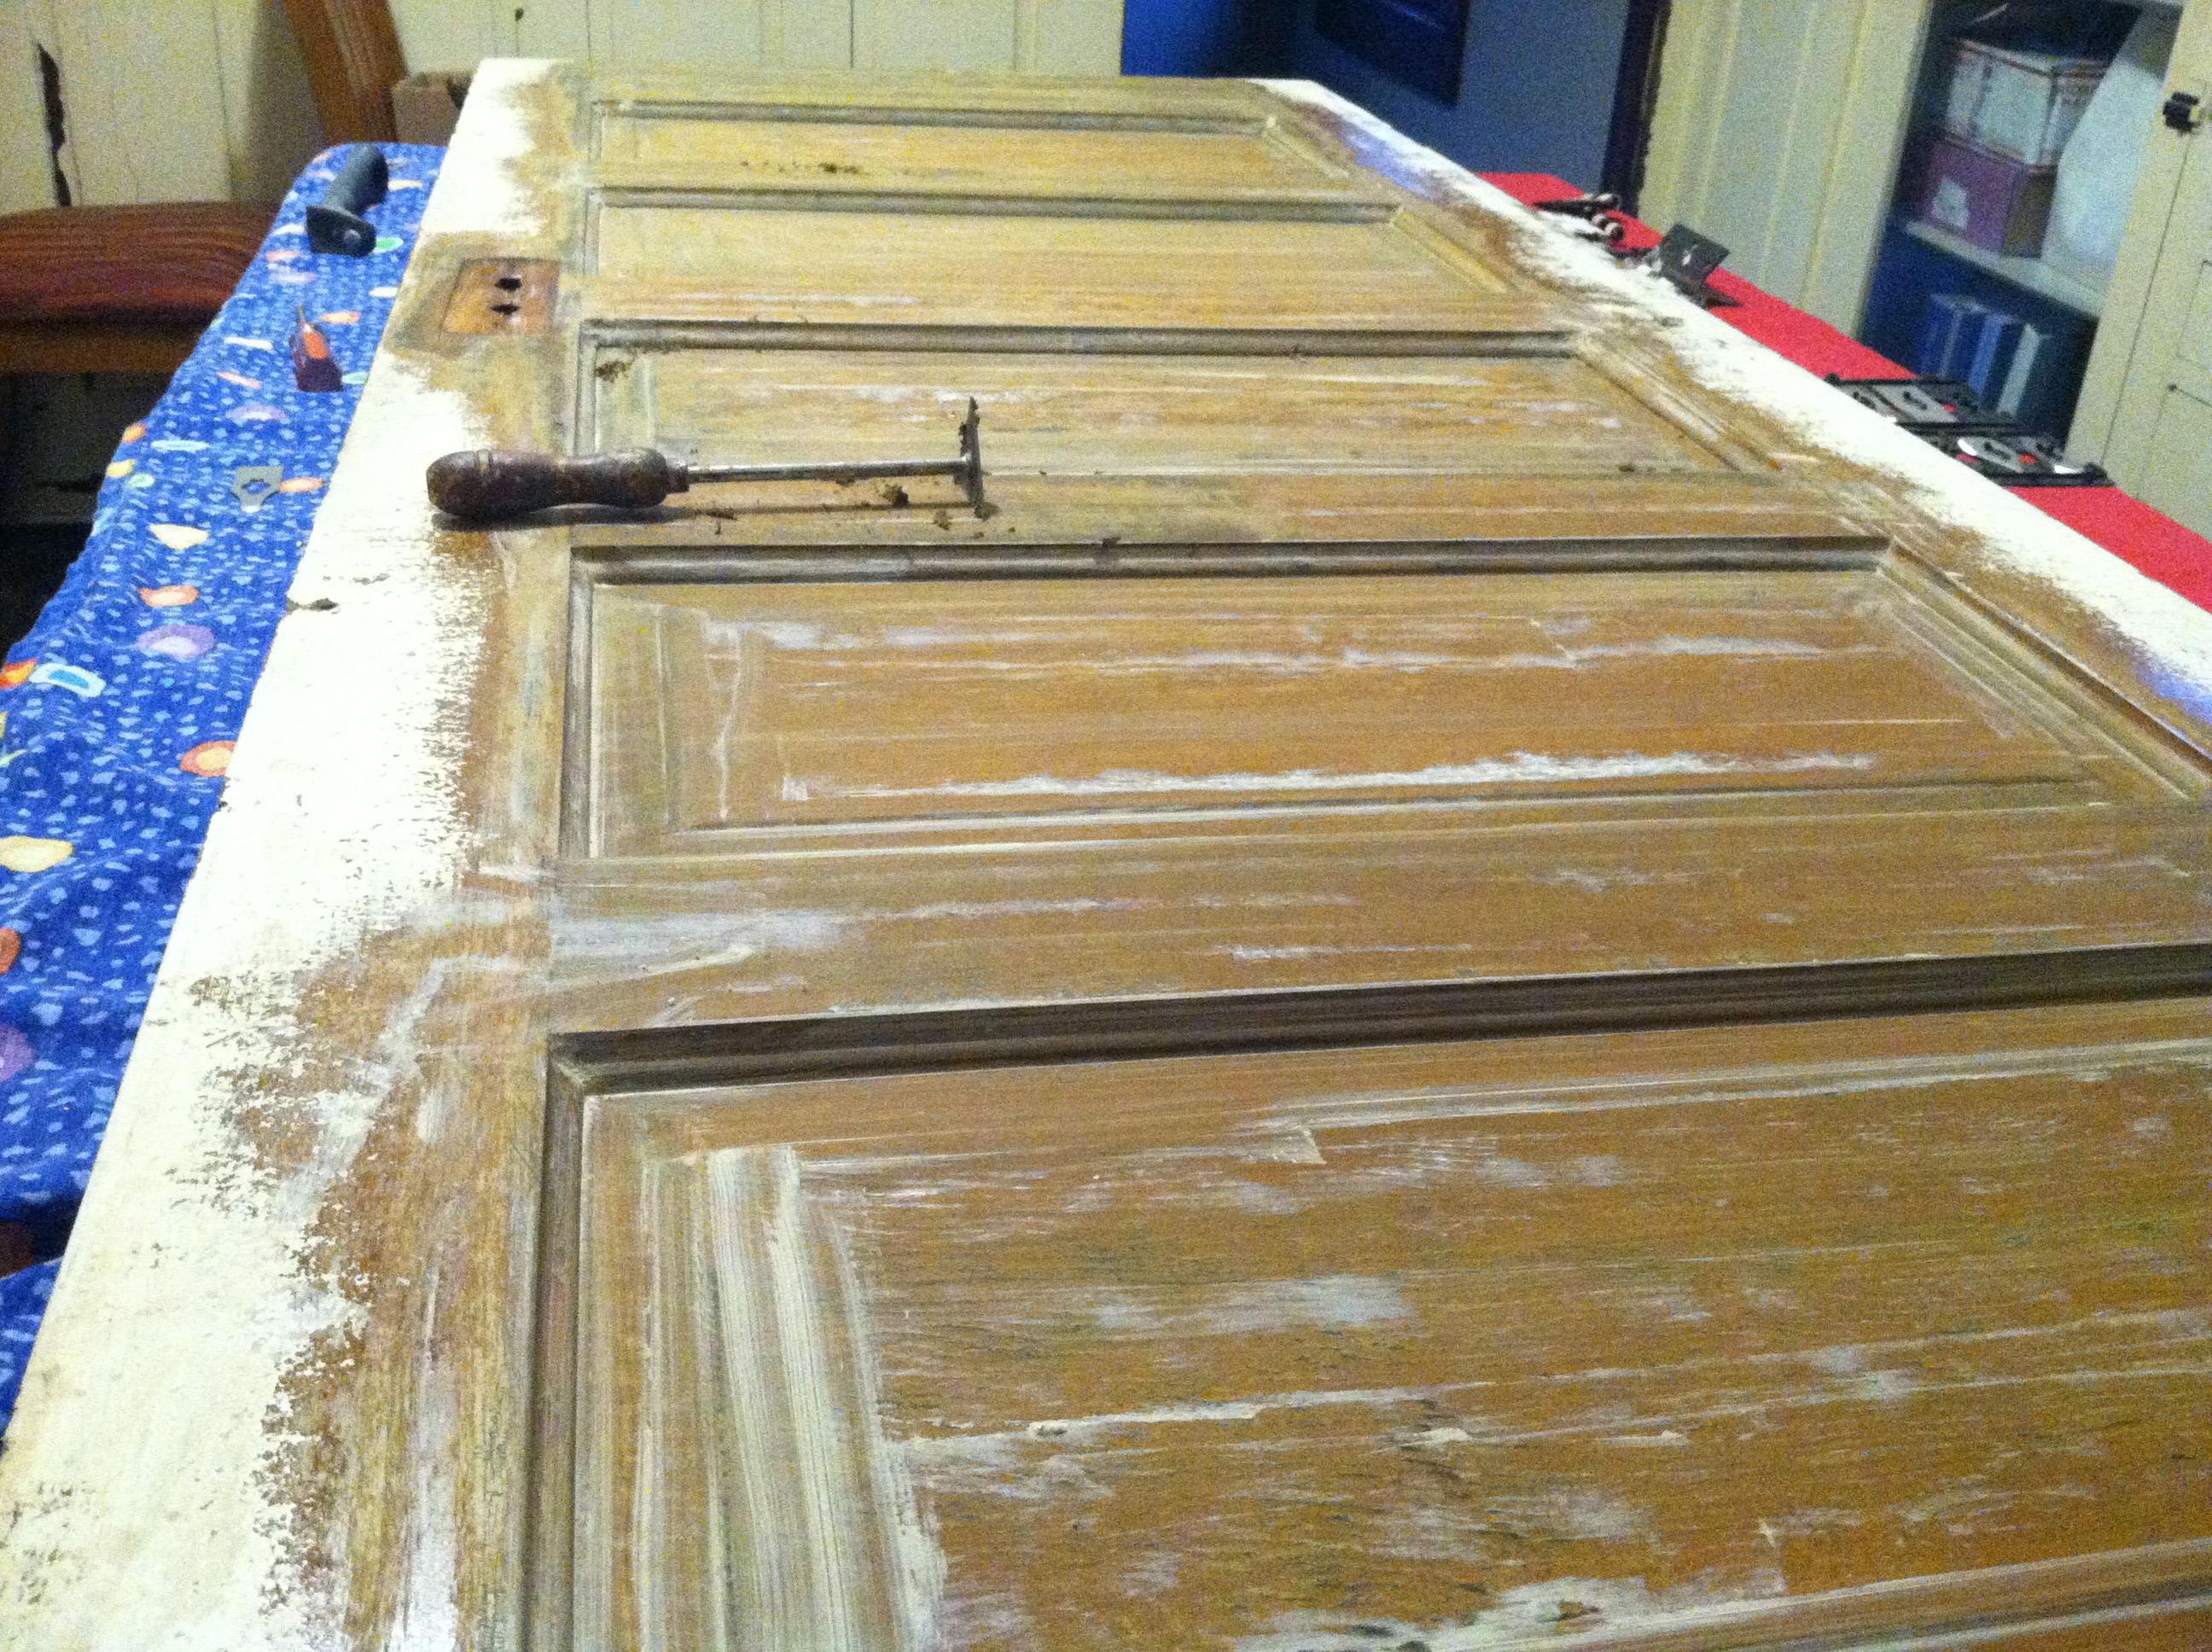
It was the correct height, but actually just about 1/4″ too narrow. I glued & clamped a thin piece of pine to the hinge edge of the door, then with a hand plane and sandpaper made it flush with the sides of the door.

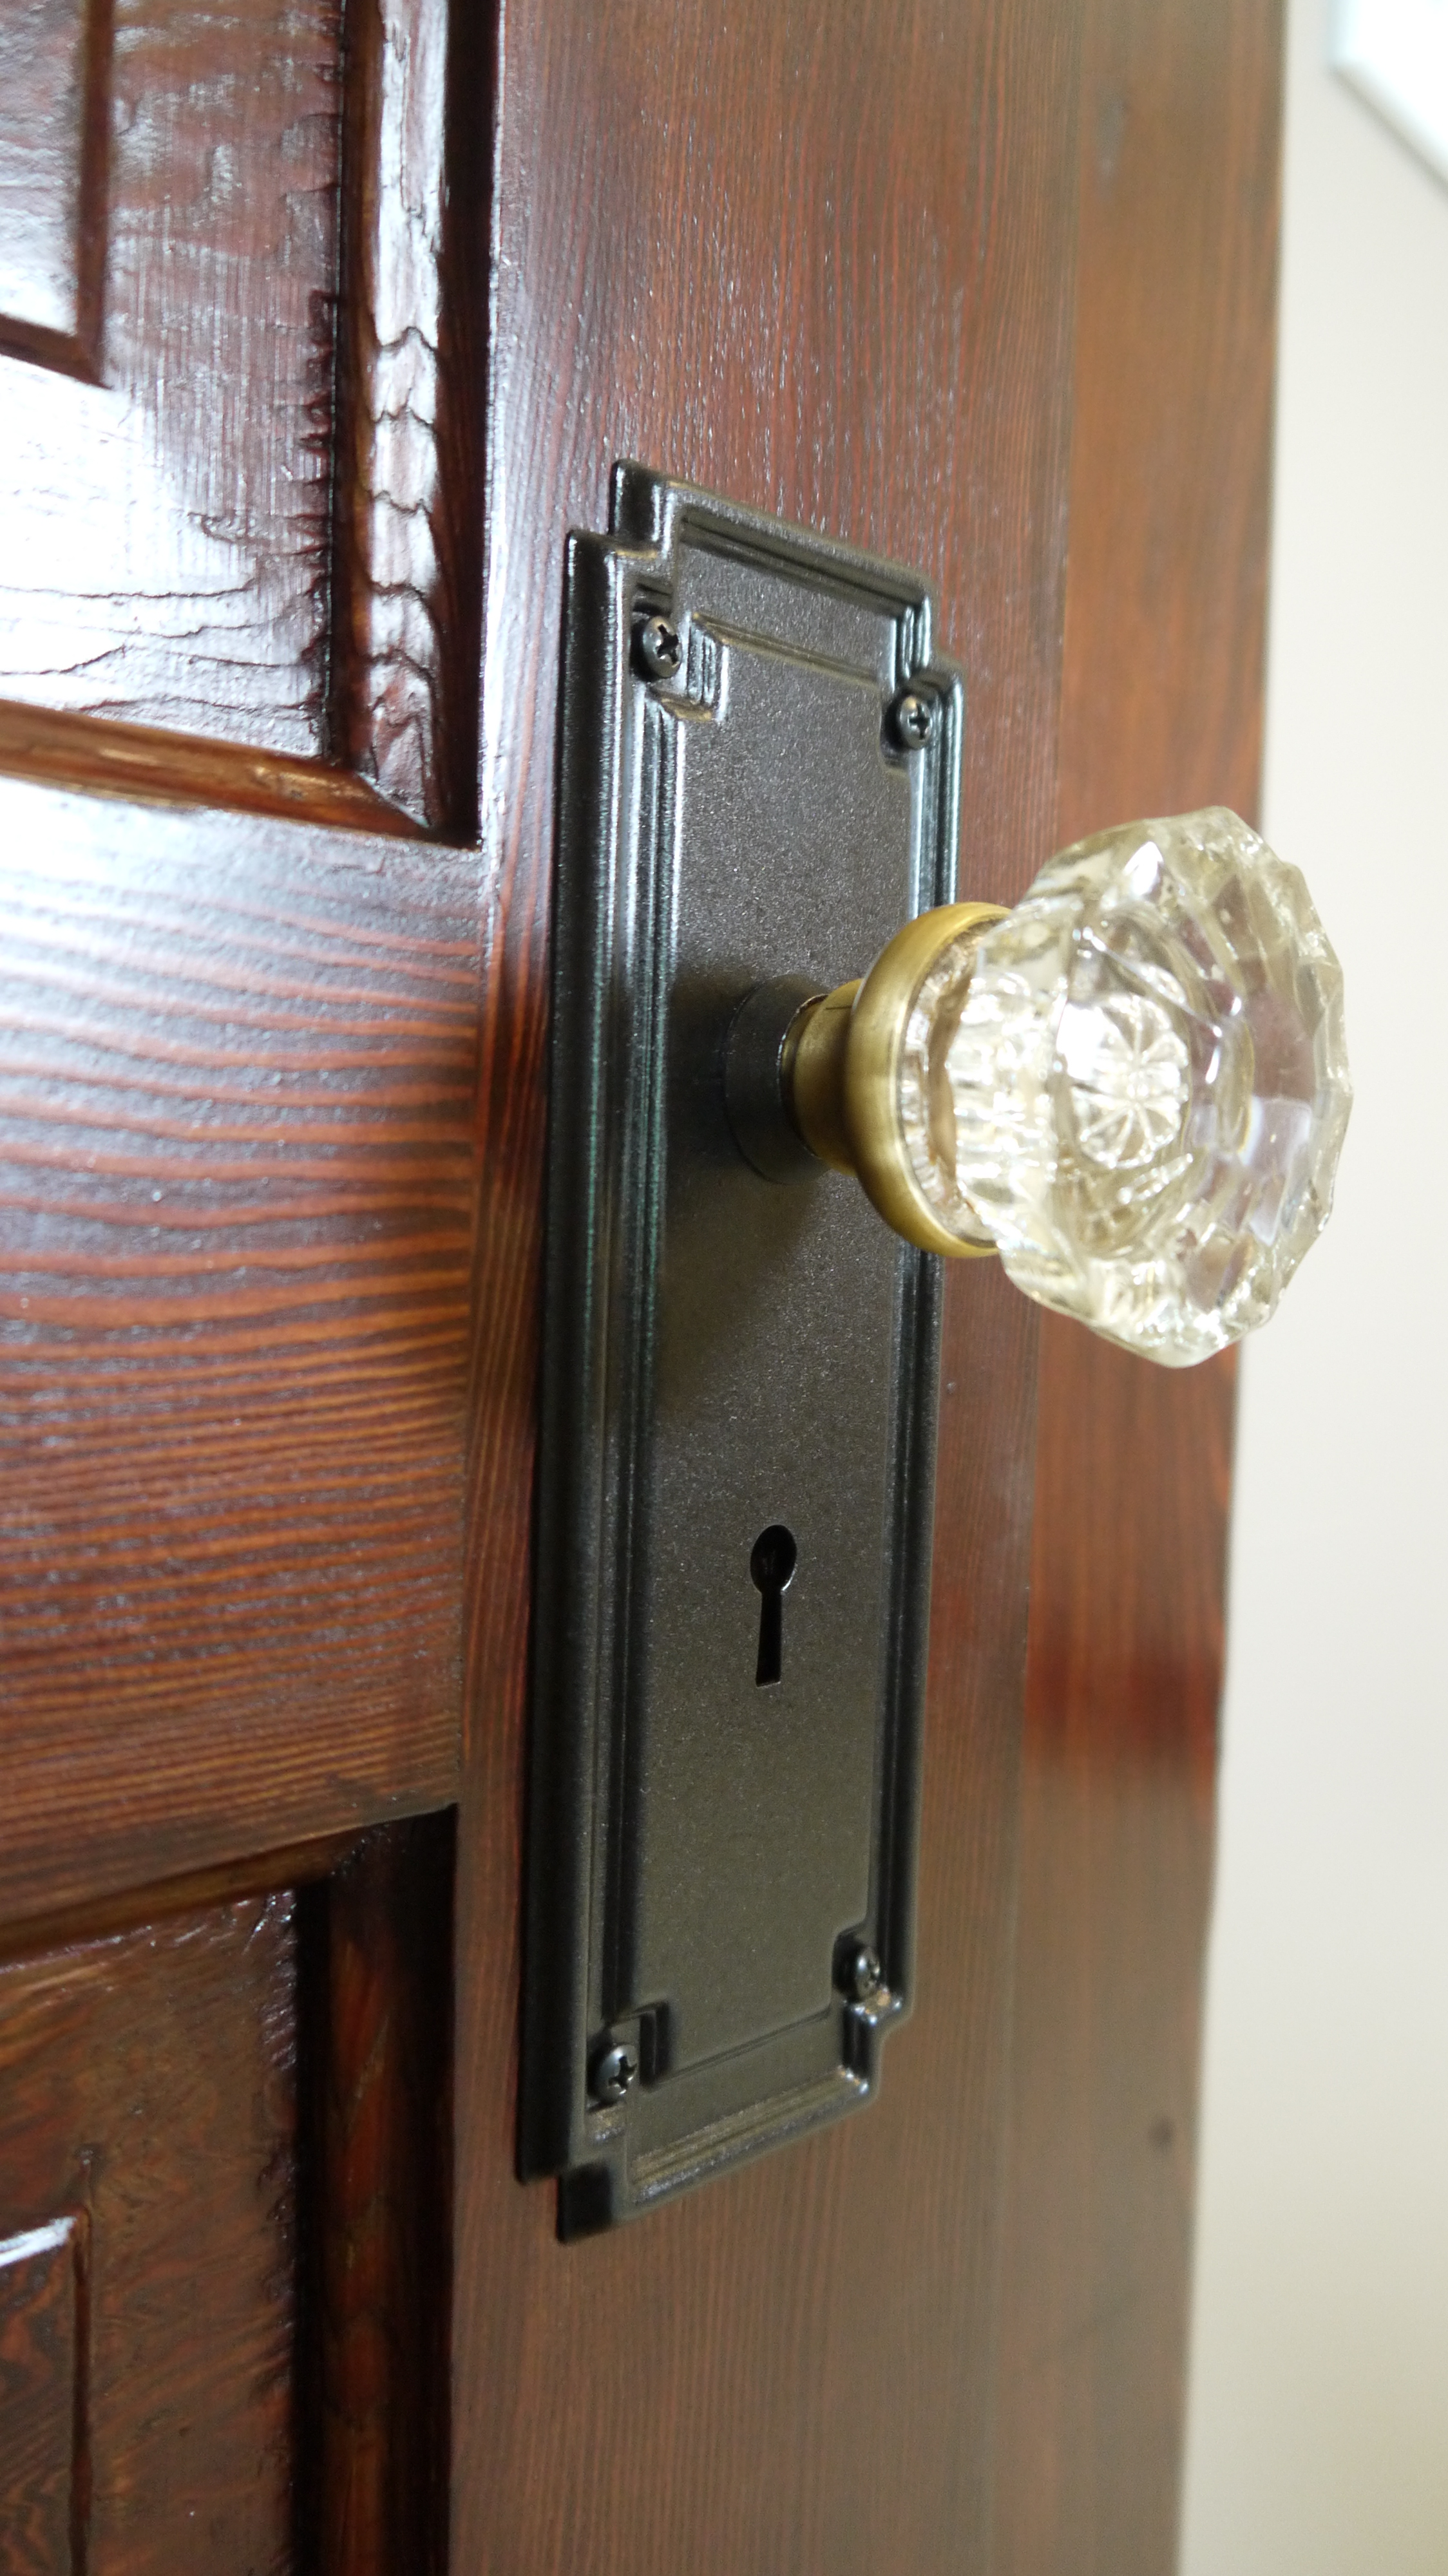
The other side was stained & varnished almost a matching color to my woodwork, so I just sanded off the finish and then re-stained both sides of the door to blend the color. It took 2 coats of stain on the freshly stripped side to get dark enough, then 2 coats of satin polyurethane. The piece I added to meet the right width is almost unnoticeable.

I’ve been collecting glass doorknobs when I find them inexpensively at antique stores or Goodwill, so I just had to buy the mortise latch threaded spindle – which I was pleasantly surprised to find they still sell at the hardware store. For me, there is nothing so rewarding as the feeling of putting the finishing touches on a completed project.

So now I begin the same process to the other bedroom, starting with stripping the woodwork and restoring the windows again.
Spare Bedroom Almost Finished
Posted by Adam A. Ries in DIY, Home Improvement, Interior Design on January 10, 2016
So I described my work on the wardrobe and even the light fixture, but I really should have first talked about how much work I’ve done to get the bedroom ready. In reality, the wardrobe and light were like finishing touches compared to how long I spent re-wiring, adding outlets, repairing the plaster, drywalling & mudding.
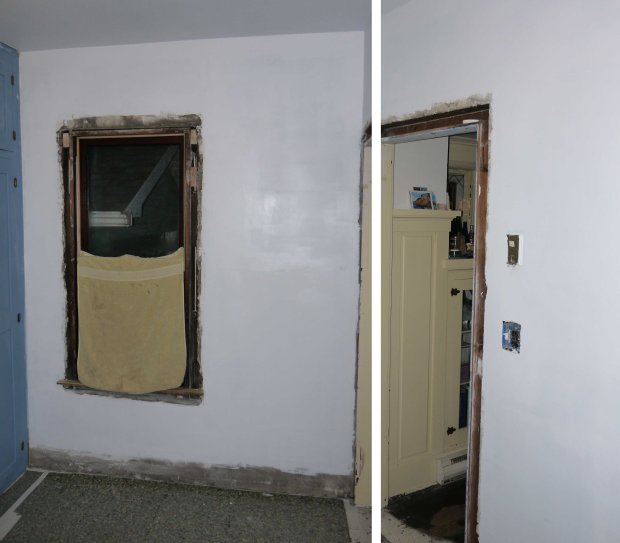
First off, this room is behind the bathroom, where there was a door-sized opening connecting this bedroom with the bathroom. Since the bathroom is (nearly) finished, the opening was closed in on that side except for the hole-in-the-wall where my medicine cabinet will eventually be installed. But because the tub/shower was previously along this wall, there was major water damage even on the bedroom side of the wall. The plaster was bubbled and crumbling all along where the tub would have been. Each time I tried to scrape it flat in preparation to mud over it, it just kept crumbling. The ceiling wasn’t in the best shape either, it was sagging in the middle and had major cracks from one wall to the next. I could have spent time scraping out each crack, reattaching the plaster to the wood slats, and then mudding and sanding.
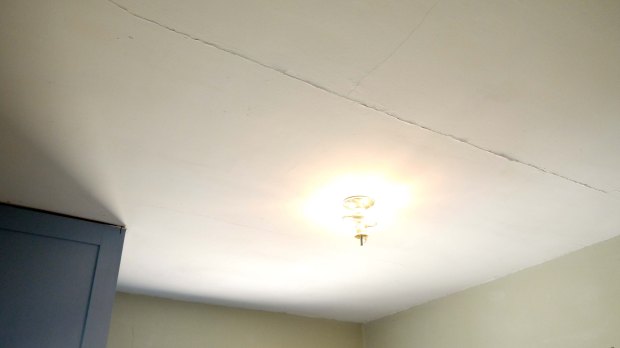
But in my mind, I kept thinking it wouldn’t last long and I’d be unhappy with the ceiling in just a short while. So I decided to drywall both the ceiling and the damaged plaster wall. No need to tear the plaster off (a ridiculous amount of work, dust, mess, and trash). I found the ceiling joists & wall studs and installed the drywall right over top, making sure my screws were long enough to reach through the plaster and secure the drywall to the framing.
First though, a friend helped me re-wire this bedroom to replace the knob & tube wiring and put the room on it’s own dedicated breaker (less electrical demand on the “whole-house breaker” of whoever previously wired my electric panel). From the crawlspace to the attic, we re-wired the ceiling light, light switch, and upgraded the room from 1 lonely outlet to 1 outlet per wall – meeting today’s standard of every 6 linear feet. This was not really an attempt to meet today’s residential electrical requirement, but more for convenience in the future since most standard lamps and other electrical items have a 6′ cord. When it came time to add outlets, rather than today’s standard height in the wall, I am installing them horizontally in the baseboard. There are already several rooms in the house where a previous owner added outlets in the baseboard, so to maintain a consistent look I decided that’s where I would add them also. The baseboards in my house are 9″ tall, so this places the outlets about 4″ off the floor. And a brown outlet and brown cover almost disappear on the dark stained woodwork.
Back to prepping the walls & ceiling. Once the drywall was hung I began to tape and mud all the seams and corners. This was my first time mudding drywall on a ceiling. Now this sounds like it would be the same as seams on the wall, but trust me it’s not the same. There is so much more coordination required with managing drywall knives while stepping up and down the step stool, and a lot more accidentally dropping (or throwing) drywall mud – landing on my pants, shoes, and the floor. I’m glad I didn’t tear the carpet out until after all this work, it caught all my mess. Lots of thin coats of mud, lots of drying time, and finally a few hours carefully sanding.
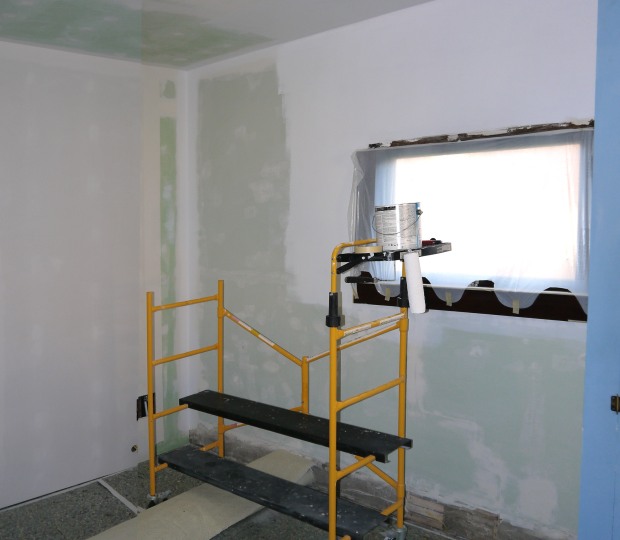
No, water resistant greenboard drywall was not required for this ro0m – I purchased more than I needed when I renovated the bathroom and couldn’t return it. At the the end of the day it’s still drywall, and once painted no one will know the difference.
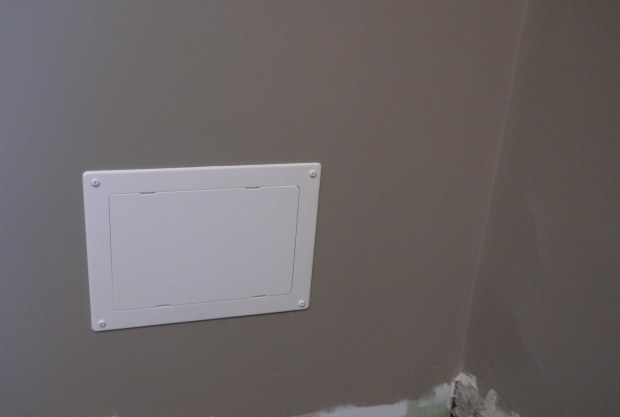
One detail I included in this room was an access panel to the shut-off valves for the tub & shower on the other side of the wall. It’s a simple plastic frame with a snap off cover if I ever need to do repairs or for some reason shut off the water lines to the tub.

While mudding I also tried my best to fix any cracks, holes, or divots in the plaster walls. These two walls below are not drywall, but rather plaster – and there is maybe more mud on these walls than on the new drywall.

I also sanded out all of the previous owners bad patch jobs, like where they slapped on spackling compound and didn’t sand it flat to the wall. Sanding is a messy job, and I always forget that until I’m covered in dust after just an hour or so.

In the end, I was pretty impressed with myself for how the walls turned out. Priming is the real reveal.

 There is one corner that isn’t perfect, but I can live with it. Imperfection is character, or so I keep telling myself.
I already had the woodwork for the windows scraped, sanded, stained & poly’d, and I was eager to nail it back into place once the walls were painted and dry. I still need to fill & stain the nail holes, but I am so happy with how this room is coming together. It will actually be the most complete room in the house in another weeks time when I get the baseboards nailed into place – and take some after photos of the full room!
Restoring Wood Windows – Putty, Prime, & Paint
Posted by Adam A. Ries in Home Improvement on January 10, 2016
Part 2 of restoring my home’s original wood windows. Part 1 is here.
Setting the glass means getting handsy with some glazing putty. Now some contractors say you can lay the glass into the rabbit using caulking or an adhesive. But I feel like that is a shortcut. The professionals who have been restoring windows for a while make a bed of the same putty that’s used on the outside of the glass, which is how wood windows would have been assembled originally 100 years ago. Recommended by all the pro’s, I use Sarco Glazing Putty, type M. I found it easy to work with, kind of like play dough. Working it like play dough for a minute or so with my hands makes it so much softer.

I lay an even thickness of putty along the rabbit on the inside the sash, using more than I need. I just move a ball of putty around the rabbit, pressing it in a few inches at a time with my palm. It’s a little messy, and it results in a lot of excess, but I wan’t squeeze out so that’s ok. Then I lay the glass on top. As carefully as I can, and often while holding my breath, I slowly work my hands around the perimeter of the glass, pressing firmly to set the glass into the putty. Also as carefully as I can, I use my glazing tool to press 2 or 3 glazing points into the groove on each side of the glass. I use these newer glazing points:

I think they are easier to set into place – and also because my first experience using the more original triangle glazier points resulted in slipping and cracking an original piece of glass, at which point I nearly gave up. (Instead I found an old glass window sash at a yard sale and was able to cut this piece of glass to fit.) The squeeze out putty can be scraped off and re-used, but using more than enough is important so that the glass makes a tight seal. Then I kind of repeat the process of pushing more putty into the rabbit with my palm, working my hand around the entire sash. I first use a glazing knife to simply push the putty tight into the groove, then it’s time time tool it smooth.
Tooling the putty is an art. Especially in the many videos online of professionals who can flawlessly tool an entire window in seconds. I spend a few minutes on each side of the glass, pressing the putty firmly into place while trying to achieve a smooth texture. Corners are a pain in the ass, I have yet to “master” a corner, but I’m getting better on each window.

Once the putty is tooled smooth – or as close as I can get it without losing my patience – I clean up the oily residue the putty leaves on the glass. This step is kind of fun, like painting only using a white powder called (what else), whiting. It’s the same whiting the professionals use, ordered online from the same company that sells the glazing putty. My understanding is that it’s pure limestone powder – it’s not cheap, but it goes a long way. With a very soft brush it really does clean the oil residue off of the glass that the putty leaves behind. It also skins the putty to encourage it to dry faster in prep for painting.
(I feel the need to insert here that yes, I have had to order many of these window restoration supplies and materials through the internet. The hardware stores around me don’t sell and can’t get many of these products. With as much time and energy I’m investing into these windows, I don’t want to substitute on inferior quality materials and take a chance of lessening how long these repairs last.)
Now onto painting – I’ve read a few different opinions, but the professionals I worked with said that using a good latex paint does not require priming the putty – the putty is manufactured to accept paint. For paint, I went by the recommendation of The Craftsman Blogger (an incredible resource for all things old house restoration!). Instead of a regular exterior latex, I went with Sherwin Williams’ Porch & Floor Enamel. It is a latex paint, but it is formulated to dry to a hard durable finish and unlike many latex paints, it doesn’t stick to other painted surfaces once cured.
I chose my paint colors for the outside of the window to stand out. Although I couldn’t tell the original color of the outside frames, while scraping paint from the sashes I could see that most original coat of paint was actually black. I love to see old houses with colorful window & frame combinations, and I really believe the “all white” or “all beige” window & trim combinations that plague so many homes is a negative result of the replacement window industry.

While scraping I found the original paint color to be black.
Although not black, I did choose a dark color for the sashes and a lighter color for the frames.
In my mind, I’m picturing a finished product something like this:
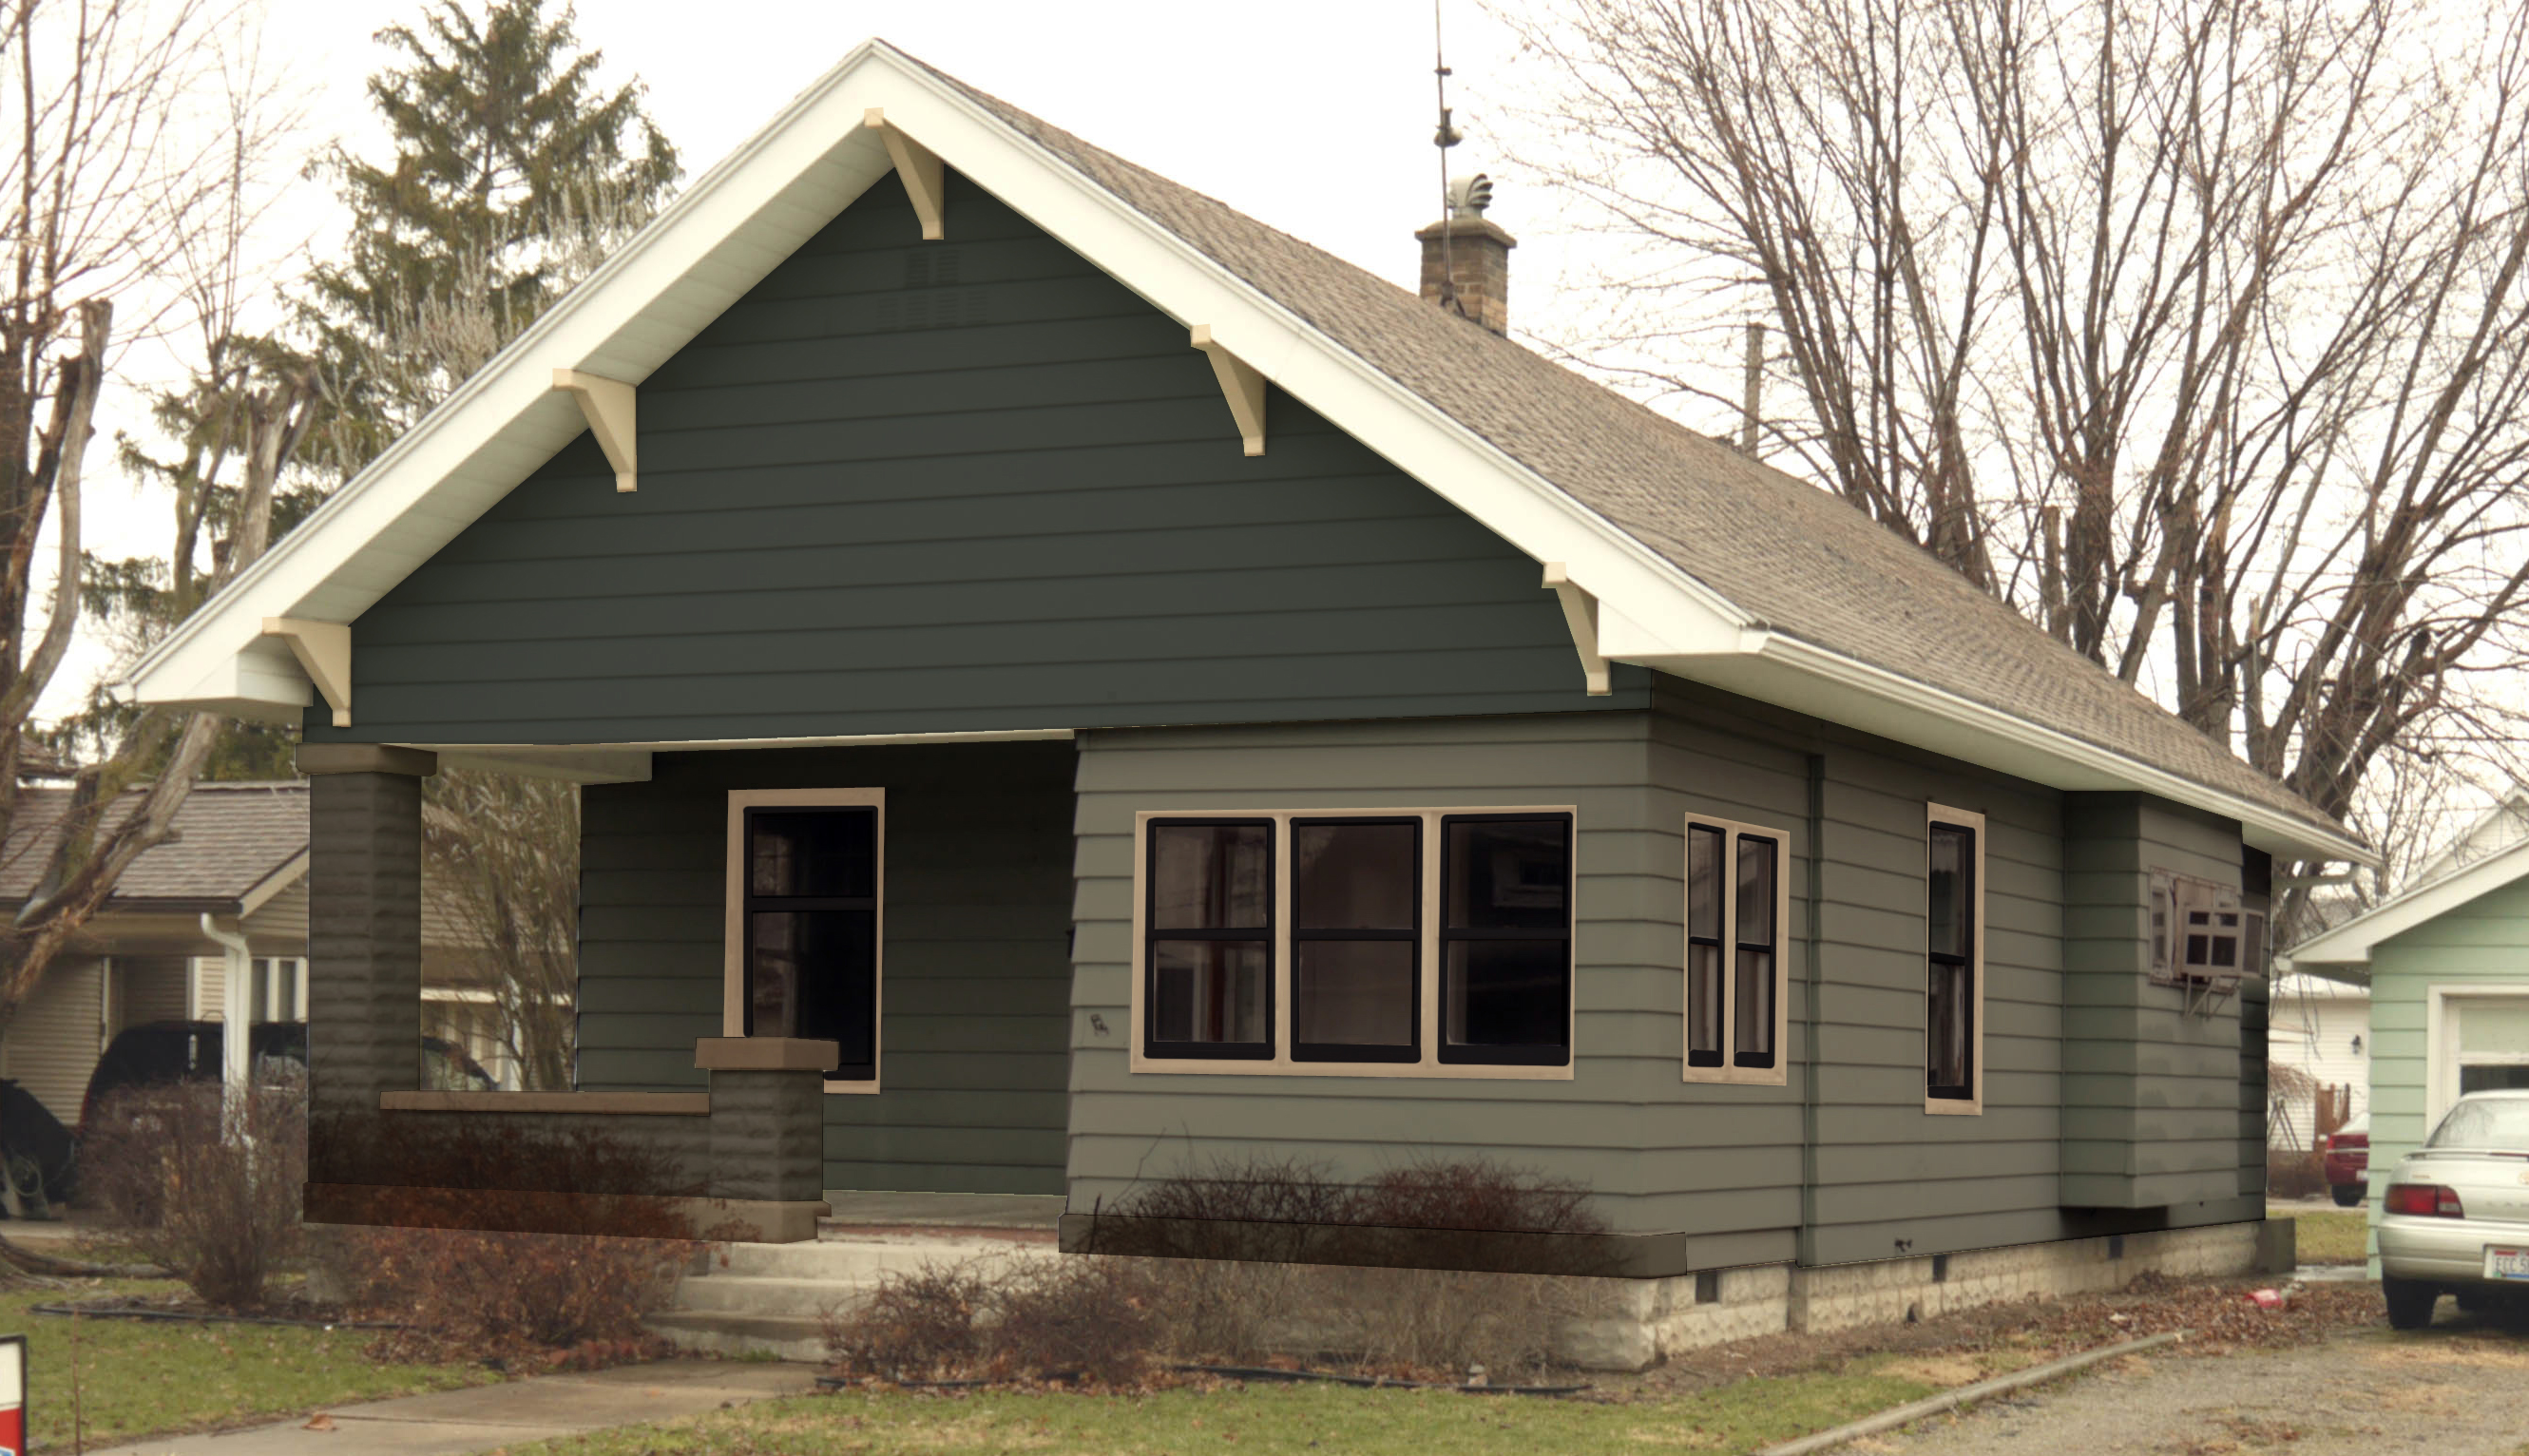
I had to work up an entire exterior color scheme before I could decide on paint colors, even though I’m quite awhile away from painting the outside of my house. But planning ahead, I was able to pinpoint the right colors for the outside of the windows. I decided on SW7069 Iron Ore for the sashes:

and SW 6105 Divine White for the window frames.

It looks more blue in this photo below, but in person its a deep navy/charcoal.

Now the secret to a long lasting window restoration? When painting the angled surface of the glazing putty, it is essential that the paint actually goes just a little bit onto the glass around the entire perimeter. Even if only 1/16 of an inch, lapping the paint onto the glass seals the putty to the glass and, from what I’ve read, makes the difference between a glazing job that lasts 5 years and one that lasts 25+ years. So many people finish their paint job with a glass scraper and scrape off the excess paint to make a perfectly clean line at the glazing putty. This ruins that seal the paint creates.
After 2 coats of paint, I wait a full week to make sure all the paint & putty is cured completely, then it’s time to put the windows back together. I bet I spent at least 3 weeks with each window tore apart. Like I said earlier, it’s all the waiting in between priming, glazing, and painting that takes the longest. Plus the fact that I get most of my work done on the weekends, so M-F of a full work week doesn’t see much progress either.
At this point I’m close to putting the window back together, but there are still a few more steps to ensure the window is air-tight. These include the original type of weatherstripping as well as 2 different types of modern weatherstripping.
